DockerSelf-HostingAIAI Coding Agents
New API with Docker: a self-hosted LLM gateway with keys, quotas and many providers (Linux, Windows, Mac)
Before you start
- 21 min read
Boxes marked Run in terminal are what you type; plain text explains why. Check what you need first
What you get in one minute#
New API is a free, self-hosted AI gateway: you add your model providers once (Ollama, OpenAI, Anthropic, Gemini and more), then every app, person or agent calls one address with its own key, quota and usage log.

Logo: the official New API project (github.com/QuantumNous/new-api)
The project calls itself "a self-hosted AI gateway for applications, agents, and teams". It suits a family or small team sharing model access, or a home lab that wants per-app keys and a usage dashboard. It is a gateway, not a model: Ollama or a cloud account must sit behind it.
| What | Value (official docs and releases, read November 2026) |
|---|---|
| Current version | v1.0.0-rc.48, a release candidate published in November 2026. GitHub marks it "Latest"; no final 1.0.0 exists yet |
| Image to pin | calciumion/new-api:v1.0.0-rc.48 (tag checked on Docker Hub, amd64 and arm64) |
| Time needed | About 25 minutes with Ollama running (our estimate) |
| Size and RAM | Image about 78 MB compressed (Docker Hub). No RAM figure in the docs |
| Ports | TCP 3000 (web console and API) |
| Licence | AGPL-3.0 plus attribution terms (LICENSE at the tag) |
| Official docs | docs.newapi.ai and the repository |
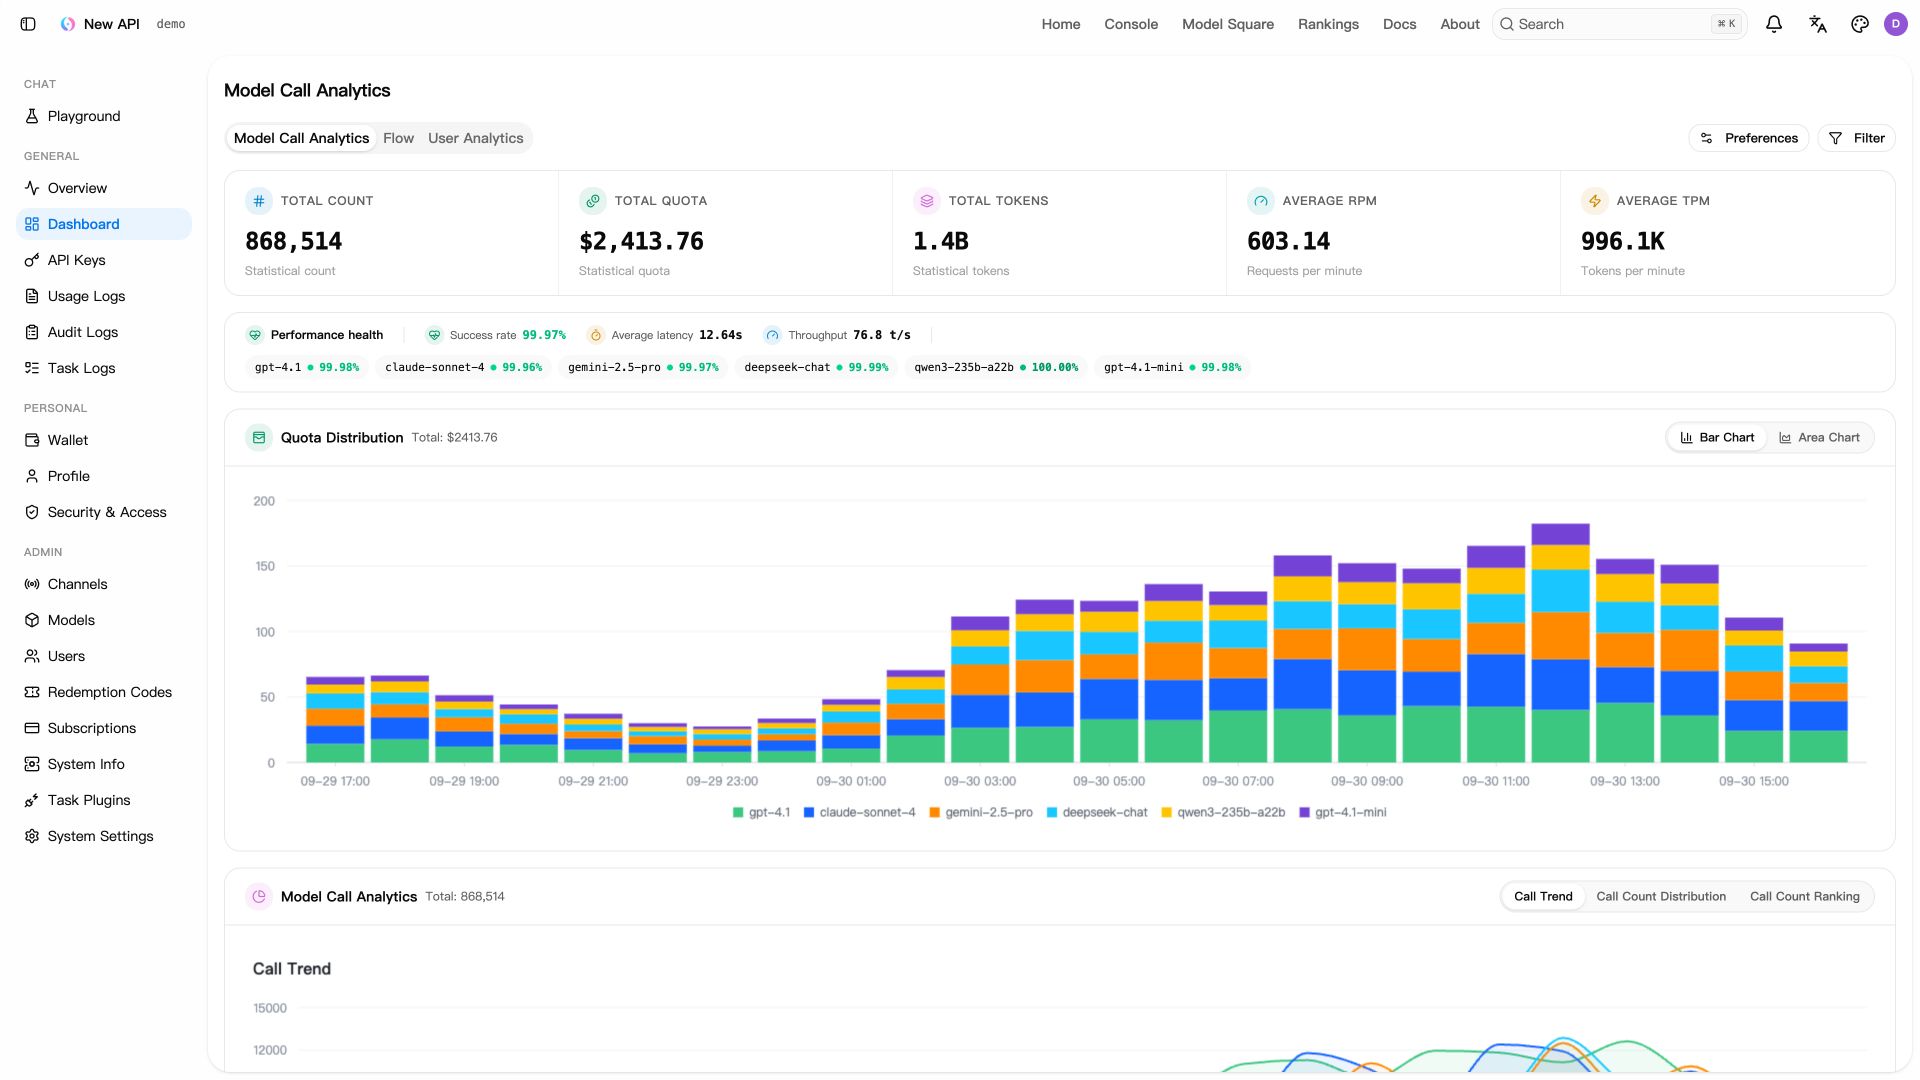
Image: the official New API project (README, Screenshots). The README says the data shown is simulated.
At a glance:
- What it is: one gateway in front of many providers, speaking OpenAI, Anthropic and Gemini request formats.
- What you control: users, groups, API keys with quota and expiry, channel priority, prices, usage logs.
- Project status: alive and busy. It moved from the Calcium-Ion to the QuantumNous organisation on GitHub and is built on One API.
- The catch: every version since April 2026 is a release candidate (48 so far). Pin one and back up before each update.
- Platforms: the docs recommend Linux (amd64, arm64). Windows and Mac work through Docker Desktop in our commands, untested.
- No default password: a setup wizard creates the admin account on first visit.
How it fits together#
Apps send one kind of request with a New API key. New API checks the key, group and quota, picks a channel, and forwards the call to Ollama on your machine or to a cloud provider. The admin works in the same web console.

Drawn for this guide from the official compose file and docs. Dashed parts are optional.
Before you start#
You need Docker with Compose and a model source.
| System | What to have |
|---|---|
| Linux | Docker Engine with the Compose plugin, curl, openssl (amd64 or arm64) |
| Windows | Docker Desktop and PowerShell 7 (the secret generator needs .NET 6 or newer). Not named in the docs |
| Mac | Docker Desktop, Terminal, curl, openssl. Not named in the docs |
Check the tools:
docker --version
docker compose version
On Windows, also check pwsh --version.
Checklist:
- [ ] Ollama runs with at least one model (
ollama pull llama3.1); see our Ollama guide - [ ] Port 3000 is free on this machine
- [ ] Any older New API or One API data is backed up
- [ ] For the HTTPS section only: a DNS name for the server and ports 80 and 443 free
Tested by DIY Lab Hub: not yet. Commands come from the official compose file, README and docs read in November 2026; we did not run them.
Step 1: Create the folders and the secrets#
New API needs three secrets: the PostgreSQL password, the Redis password and SESSION_SECRET. The official compose file ships with password 123456, and the README asks for a persistent random SESSION_SECRET. We keep all three in .env.
Linux#
mkdir -p ~/docker_volumes/new-api/{data,logs,backups}
cd ~/docker_volumes/new-api
umask 077
cat > .env << EOF
POSTGRES_PASSWORD=$(openssl rand -hex 16)
REDIS_PASSWORD=$(openssl rand -hex 16)
SESSION_SECRET=$(openssl rand -hex 32)
TZ=UTC
EOF
chmod 600 .env
Windows (PowerShell)#
New-Item -ItemType Directory -Force "$HOME\docker_volumes\new-api\data","$HOME\docker_volumes\new-api\logs","$HOME\docker_volumes\new-api\backups"
Set-Location "$HOME\docker_volumes\new-api"
function New-Hex($n) { [Convert]::ToHexString([Security.Cryptography.RandomNumberGenerator]::GetBytes($n)).ToLower() }
@"
POSTGRES_PASSWORD=$(New-Hex 16)
REDIS_PASSWORD=$(New-Hex 16)
SESSION_SECRET=$(New-Hex 32)
TZ=UTC
"@ | Set-Content -Path .env -Encoding utf8
Mac (Terminal)#
Same commands as Linux.
Hex strings are safe inside the database address; symbols such as @ would break it. Set TZ to your own zone if you like (the official file uses Asia/Shanghai).
Check it worked. Linux and Mac: ls -l .env shows -rw------- and grep -c = .env prints 4. Windows: (Get-Content .env).Count prints 4. Never paste the file's content anywhere.
Tip: Copying
.env.examplealone does nothing: the README says only Compose'senvironmentorenv_fileinjects variables into the container.
Step 2: Write the Compose file and start New API#
This is the official compose file with changes: pinned image, secrets from .env, no obsolete version: line, restart: unless-stopped, and port 3000 published on 127.0.0.1 only (the official file publishes it everywhere). Redis is pinned to 7.4 (our choice; the official file says latest). extra_hosts lets the container reach Ollama on the host.
Linux#
cd ~/docker_volumes/new-api
cat > docker-compose.yml << 'EOF'
services:
  new-api:
    image: calciumion/new-api:v1.0.0-rc.48
    container_name: new-api
    restart: unless-stopped
    command: --log-dir /app/logs
    ports:
      - "127.0.0.1:3000:3000"
    extra_hosts:
      - "host.docker.internal:host-gateway"
    volumes:
      - ./data:/data
      - ./logs:/app/logs
    environment:
      - SQL_DSN=postgresql://root:${POSTGRES_PASSWORD}@postgres:5432/new-api
      - REDIS_CONN_STRING=redis://:${REDIS_PASSWORD}@redis:6379
      - SESSION_SECRET=${SESSION_SECRET}
      - TZ=${TZ}
      - ERROR_LOG_ENABLED=true
      - BATCH_UPDATE_ENABLED=true
      - NODE_NAME=new-api-node-1
    depends_on:
      - redis
      - postgres
    networks:
      - new-api-network
    healthcheck:
      test: ["CMD-SHELL", "wget -q -O - http://localhost:3000/api/status | grep -o '\"success\":\\s*true' || exit 1"]
      interval: 30s
      timeout: 10s
      retries: 3

  redis:
    image: redis:7.4
    container_name: new-api-redis
    restart: unless-stopped
    command: ["redis-server", "--requirepass", "${REDIS_PASSWORD}"]
    networks:
      - new-api-network

  postgres:
    image: postgres:15
    container_name: new-api-postgres
    restart: unless-stopped
    environment:
      POSTGRES_USER: root
      POSTGRES_PASSWORD: ${POSTGRES_PASSWORD}
      POSTGRES_DB: new-api
    volumes:
      - pg_data:/var/lib/postgresql/data
    networks:
      - new-api-network

volumes:
  pg_data:

networks:
  new-api-network:
    driver: bridge
EOF
docker compose config --quiet && echo "compose file OK"
docker compose up -d
docker compose ps
docker compose logs --tail=50 new-api
Windows (PowerShell)#
Save the same YAML as docker-compose.yml in $HOME\docker_volumes\new-api (open it with notepad docker-compose.yml, paste the YAML from the Linux block, save as UTF-8), then:
Set-Location "$HOME\docker_volumes\new-api"
docker compose config --quiet; if ($?) { "compose file OK" }
docker compose up -d
docker compose ps
docker compose logs --tail=50 new-api
Mac (Terminal)#
Same commands as Linux.
PostgreSQL stays on a named volume, as in the official file; we back it up with pg_dump.
Check it worked. docker compose ps shows new-api running and, after about a minute, healthy. The health check calls /api/status; from the host:
curl -s http://localhost:3000/api/status
On Windows use curl.exe. The docs publish no sample output; the health check passes when the JSON contains "success":true.
Tip: Copy the image tag exactly.
latestfollows every published build, and every build is a release candidate.
Step 3: Create the admin account in the setup wizard#
There is no default login. The docs say the first visit "will automatically redirect to the initialization page" where you set the administrator account. The wizard also offers Self-use mode, which the FAQ names as the fix for "Ratio or price not configured": tick it for a private instance. Leave the demo-site option off.
Linux#
Open http://localhost:3000 on the server, or from another computer through a tunnel left running:
ssh -N -L 3000:127.0.0.1:3000 <your-user>@<your-server-address>
Windows (PowerShell)#
Open http://localhost:3000. For another machine, run the same tunnel and keep the window open:
ssh -N -L 3000:127.0.0.1:3000 <your-user>@<your-server-address>
Mac (Terminal)#
Open http://localhost:3000; for another machine use the Linux tunnel command.
The setup code limits the username to 12 characters; the two password fields must match (release notes: 8 to 128 characters).
Check it worked. The login works and the left menu shows Dashboard, API Keys, Channels, Users and System Settings.
Tip: Save the admin password in a password manager now. Old tutorials say
rootand123456; the current docs describe only the wizard.
Step 4: Add a channel for Ollama#
A channel is one provider connection ("one provider's API key", say the docs). Open Channels and choose Add Channel.
Linux#
The web console is the same in a browser on every system.
Windows (PowerShell)#
Same in the browser.
Mac (Terminal)#
Same in the browser.
Fill in the form:
| Field | What to enter |
|---|---|
| Type | Ollama |
| Name | local-ollama |
| Key | Any text, such as ollama. The form needs a non-empty key; Ollama ignores it |
| Models | The model you pulled, for example llama3.1 (or "Fill Default Models") |
| Base URL | http://host.docker.internal:11434 (no /v1, no path) |
| Group | Leave the default group |
The adaptor source at the release tag adds /api/chat to the base URL, so the base URL has no path. A per-channel switch for OpenAI-compatible chat uses /v1/chat/completions instead.
For Ollama on another machine, use its address. On Linux, Ollama listens on 127.0.0.1 by default, so a container may not reach it; our LiteLLM guide explains the OLLAMA_HOST fix in its Step 3. Docker Desktop resolves host.docker.internal on Windows and Mac.
Press Test on the channel row; the docs say a dialog shows the response time and the result.
Check it worked. The test shows a response time and the channel stays green (active).
Step 5: Create an API key for an app#
Never give an app your admin login. Open API Keys and choose Create API Key.
Linux#
Browser only, as in Step 4.
Windows (PowerShell)#
Browser only.
Mac (Terminal)#
Browser only.
Settings from the docs:
| Setting | Use |
|---|---|
| Name | The app or person, for example laptop-test |
| Quota or Unlimited Quota | Token quota is separate from the account quota; it only caps this key |
| Expiration time | The key is refused after this moment |
| Model restrictions | Limit the key to llama3.1; blank means no limit |
| IP whitelist | Optional, one IP or CIDR per line |
Save, then click the masked key to copy it (it starts with sk- in the docs' examples). The docs call keys "equivalent to passwords": keep them out of chats, repositories and screenshots, and delete a leaked key at once.
Check it worked. The key appears in the list as enabled.
Tip: Make one key per app. When one app misbehaves you disable that key and the others keep working.
Step 6: Send your first request#
Use the New API key, never the admin password. The address for OpenAI-style clients is http://localhost:3000/v1.
Linux#
export NEW_API_KEY='<YOUR_NEW_API_KEY>'
curl --fail-with-body http://localhost:3000/v1/models -H "Authorization: Bearer ${NEW_API_KEY}"
curl --fail-with-body http://localhost:3000/v1/chat/completions \
  -H "Authorization: Bearer ${NEW_API_KEY}" -H "Content-Type: application/json" \
  -d '{"model":"llama3.1","messages":[{"role":"user","content":"Say hello in five words."}]}'
Windows (PowerShell)#
$h = @{ Authorization = "Bearer <YOUR_NEW_API_KEY>" }
Invoke-RestMethod -Uri http://localhost:3000/v1/models -Headers $h
$body = @{ model = "llama3.1"; messages = @(@{ role = "user"; content = "Say hello in five words." }) } | ConvertTo-Json -Depth 5
Invoke-RestMethod -Uri http://localhost:3000/v1/chat/completions -Method Post -Headers $h -ContentType "application/json" -Body $body
Mac (Terminal)#
Same commands as Linux.
Check it worked. /v1/models lists only the models this key may use. The chat call returns OpenAI-style JSON with the answer in choices[0].message.content (the docs show no sample output). Usage Logs in the console now lists the call with channel, tokens and cost.
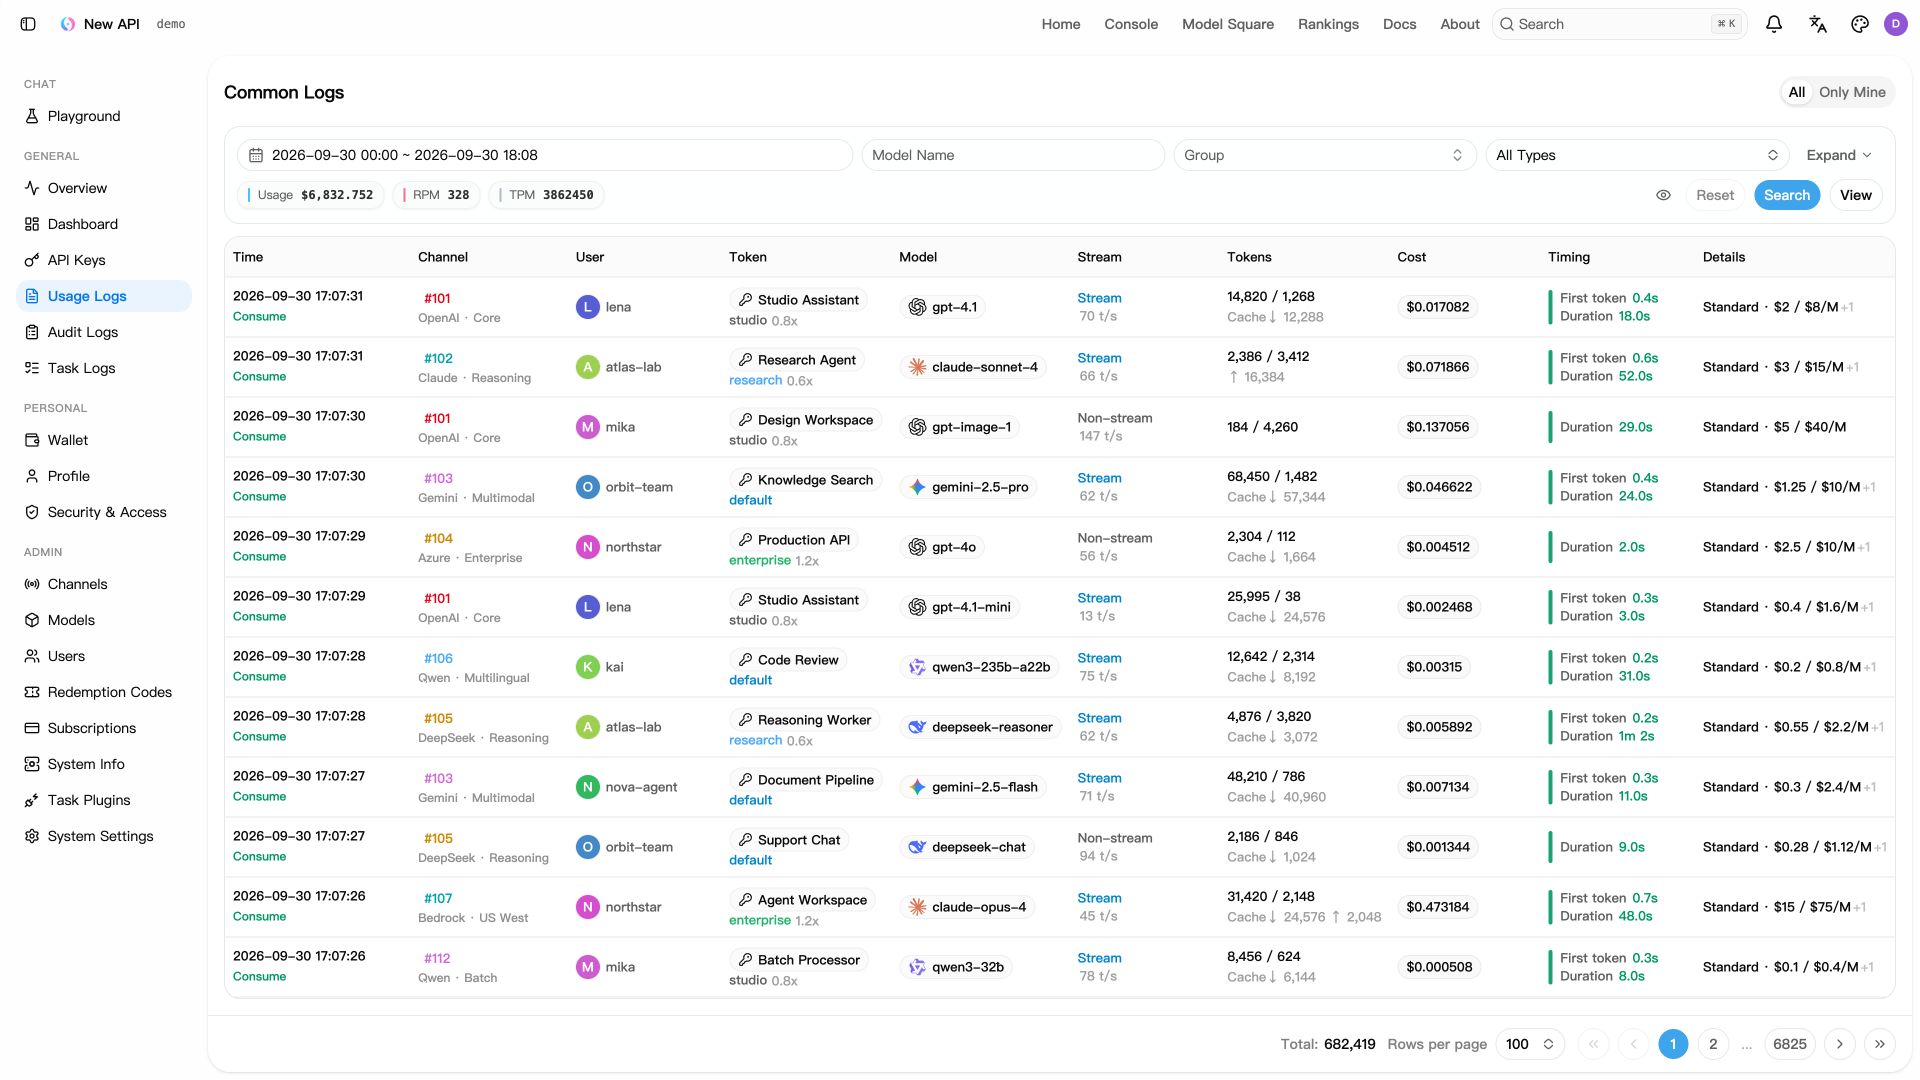
Image: the official New API project (README, Screenshots). Simulated data, as the README states.
Any app with an "OpenAI base URL" and "API key" setting works the same way. The docs also cover desktop clients and coding tools such as Claude Code and the Codex CLI under AI Applications.
Quotas, groups and routing in plain words#
The FAQ gives the price formula: Quota = Group Ratio x Model Ratio x (prompt tokens + completion tokens x completion ratio).
- Groups decide which channels a user or key may use; user, key and channel each carry a group.
- Priority: a higher number is used first. Weight splits requests between channels of the same priority (the FAQ: weights 2:1 give a 2:1 split).
- Failover idea: Ollama at priority 2 and a cloud channel at priority 1 means cloud is used only when the local channel fails. We did not test this.
- Cloud keys are your own accounts. The project's notice says to use only keys you are authorised to use and follow each provider's terms.
Put it behind HTTPS (with or without Traefik)#
For a server people reach by name, put New API behind HTTPS and drop the host port. Local-only users can keep 127.0.0.1:3000 and skip this section. The README asks for HTTPS in front of the console, with streaming and WebSocket upgrades passed through. Both routes need a DNS record for the server.
First edit the new-api service (both routes): delete the ports: lines, join the external proxy network, and set the two cookie variables to your exact HTTPS address (no path, no wildcard):
    environment:
      # keep the existing lines, and add these two
      - SESSION_COOKIE_SECURE=true
      - SESSION_COOKIE_TRUSTED_URL=https://new-api.<your-domain>
    networks:
      - new-api-network
      - proxy
At the bottom of the file, add the network next to new-api-network, and create it once with docker network create proxy:
networks:
  new-api-network:
    driver: bridge
  proxy:
    external: true
With Traefik#
On a server that already runs Traefik v3 with the Docker provider, add these labels to the new-api service. We assume an entrypoint called https; use your own name.
    labels:
      - "traefik.enable=true"
      - "traefik.docker.network=proxy"
      - "traefik.http.routers.new-api.rule=Host(`new-api.<your-domain>`)"
      - "traefik.http.routers.new-api.entrypoints=https"
      - "traefik.http.routers.new-api.tls=true"
      - "traefik.http.services.new-api.loadbalancer.server.port=3000"
Run docker compose up -d in the New API folder. Check it worked: curl -I https://new-api.<your-domain>/ returns a status line over HTTPS.
Without Traefik: Caddy#
Choose this if you have no Traefik. Caddy gets and renews its own certificates: Let's Encrypt for a public domain, tls internal for a local certificate at home. Its reverse_proxy passes WebSocket upgrades and flushes text/event-stream responses at once, so streamed answers need no extra settings. Caddy's Docker docs advise mounting the folder, not one Caddyfile, so we mount conf.
mkdir -p ~/docker_volumes/caddy/{conf,data,config}
cd ~/docker_volumes/caddy
On Windows: New-Item -ItemType Directory -Force "$HOME\docker_volumes\caddy\conf","$HOME\docker_volumes\caddy\data","$HOME\docker_volumes\caddy\config". Save as docker-compose.yml there (caddy:2.11.8 was the latest release in November 2026):
services:
  caddy:
    image: caddy:2.11.8
    container_name: caddy
    restart: unless-stopped
    ports:
      - "80:80"
      - "443:443"
      - "443:443/udp"
    volumes:
      - ./conf:/etc/caddy
      - ./data:/data
      - ./config:/config
    networks:
      - proxy

networks:
  proxy:
    external: true
Save as conf/Caddyfile for a public domain:
new-api.example.com {
    reverse_proxy new-api:3000
}
For a home-only name, add tls internal:
new-api.home.arpa {
    tls internal
    reverse_proxy new-api:3000
}
Run docker compose up -d in both folders. With tls internal, each device must trust Caddy's root certificate; our Caddy guide shows the steps for Linux, Windows and Mac in its Step 5.
Check it worked. curl -I https://new-api.example.com/ (Windows: curl.exe) returns a status line over HTTPS. A home name shows a padlock only after the root is trusted.
Tip: A console that loops back to the login page usually has a
SESSION_COOKIE_TRUSTED_URLthat differs from the browser's address by one character (scheme, name or port). Copy it from the address bar.
Security and testing#
A gateway holds your provider keys and spends your money, so treat the console like a bank page.
| Control | How |
|---|---|
| Admin account | Long unique password. The README lists two-factor authentication and passkeys; see the clock warning in Troubleshooting before enabling them |
| Port 3000 | 127.0.0.1 or no host port behind HTTPS. Never forward it on your router |
| Secrets | Only in .env, mode 600, never in git or issue reports |
SESSION_SECRET | Random and stable; all nodes of one deployment share it |
| Registration | In System Settings, check the "Open Registration" switch and turn it off for a private gateway |
| App keys | One per app, with a model list, an expiry and, if you can, an IP list |
TRUSTED_PROXIES | Unset trusts loopback and private ranges (and warns). Set your proxy's network, or none |
| Private addresses | An issue (closed, October 2026) says the SSRF protection can only allow private IPs globally, which also covers user-sent image and file URLs. Keep it off unless needed |
| Telemetry | The docs describe none; Google Analytics and Umami variables in the compose file are off unless you set them |
Quick tests after each change (Windows: Set-Location "$HOME\docker_volumes\new-api" and curl.exe):
cd ~/docker_volumes/new-api
docker compose ps
docker compose logs --tail=100 new-api
curl -s http://localhost:3000/api/status
Release candidates: what that means for you#
The last 0.x image, v0.13.2, is from late April 2026; v1.0.0-rc.1 followed two days later and rc.48 came in November 2026. No final 1.0.0 exists, so the newest "stable" is a candidate. From the notes:
- rc.38 called the experimental plugin system "still not recommended for production use". The later notes we read do not repeat it.
- rc.46 fixes a security problem ("please upgrade soon"), so do not stay on an old candidate forever.
- Updates change behaviour: rc.41 replaced the dashboard access token with named tokens, rc.44 cleared Playground history once, rc.48 signs the Redis caches (upgrade all nodes together).
Our rule: pin a tag, back up the database, read the notes, update when something you need is fixed, and note the old tag. The docs show rollback by pulling an older tag but warn that database changes may not be compatible, so the backup is your real way back.
New API or LiteLLM: which should you choose?#
Both give one OpenAI-style address with keys and budgets. See our LiteLLM guide. The table lists only what we read in each project's docs.
| Question | New API (rc.48) | LiteLLM (our guide, v1.106.3) |
|---|---|---|
| Adding models | Web console channels, stored in the database | config.yaml file, plus an Admin UI with Postgres |
| People | Users, groups, wallets, subscriptions, redemption codes | Virtual keys per app or person |
| Cost control | Quota units from group and model ratios | Money budgets per key, with time windows |
| Release state | Release candidates only | Numbered releases |
| Language | English docs; many issues and notes also in Chinese | English |
| Licence | AGPL-3.0 with attribution terms | See its repository |
Choose New API when people should sign in and see their own quota and usage in a ready console. Choose LiteLLM when you want everything in a config file you keep in git, or no release candidates. Run only one on a port.
Common mistakes#
From the official docs' warnings, real GitHub issues and common AI assistant answers.
| Mistake | Why it happens | Do this instead |
|---|---|---|
Pulling latest | The README: latest "can change". Issue 7361 (closed, September 2026): after a latest pull, memory went from about 75 MiB to 1.77 GB and a 2 GB host ran out | Pin v1.0.0-rc.48; change it yourself after reading the notes |
| Hopping between tags | Issue 4178 (closed, April 2026): latest to nightly gave permission denied for schema public (SQLSTATE 42501) | Stay on one tag; dump the database before any switch |
| Keeping the official example passwords and port | The compose file uses 123456 and publishes 3000:3000 on all interfaces | Use the .env secrets and 127.0.0.1:3000 |
| Server clock a few minutes off | Issue 7735 (open): changing a password, adding 2FA or creating a key failed with "server returned no verification credential"; the proof token lives about 60 seconds and the clock was 2 to 9 minutes off | Enable time sync on the host first |
| Too many login sessions | Issue 6972 (open): admin login refused with "active login session count reached the limit" | Raise USER_SESSION_ACTIVE_LIMIT (the issue used 100), restart, sign out other sessions |
| Token quota versus account quota, or no model price | FAQ: token quota only caps one key; a model without a price gives "Ratio or price not configured" | Check the key's quota (or Unlimited Quota); set prices or turn on Self-use mode |
localhost or /v1 in the Ollama base URL | localhost is the container itself; the adaptor adds /api/chat itself | http://host.docker.internal:11434, no path |
AI assistants: "the admin login is root / 123456" | Old One API tutorials; the current docs use a setup wizard | Create the admin in the wizard |
AI assistants: inventing OPENAI_API_KEY variables or a config.yaml for models | Mixing up LiteLLM; New API keeps provider keys in channels | Add providers under Channels; use only variables from the official environment page |
Tip: Before pasting a compose file from a chat answer, compare the image tag and the variable names with the official file at the release tag you pin.
Tip: When an upstream error appears, repeat the same request against the provider directly. The maintainers' issue template asks for that comparison before a report.
Tip: Reloading the console many times in a row can lock the admin out for a short while (issue 7783, open). Wait a minute instead of clicking again.
Troubleshooting#
| Problem | Solution |
|---|---|
| Container restarts | docker compose logs --tail=100 new-api; check .env has four lines and docker compose config shows no empty password |
| Channel test: connection refused | Ollama is not reachable from the container: check the Base URL and OLLAMA_HOST (LiteLLM guide, Step 3) |
invalid character '<' looking for beginning of value | The reply was a web page; the FAQ says a deployment IP or proxy blocked by Cloudflare is the usual cause |
Ratio or price not configured, please contact the administrator to set it. | Set ratios in System Settings or enable Self-use mode |
| "No available channels" | Check user group, channel group and the channel's model list |
Current group load is saturated, please try again later. | An upstream channel returned 429; add a channel or wait |
Database consistency has been corrupted, please contact the administrator? | Invalid records after hand-editing the database; use the console, not SQL |
| Memory keeps growing | docker stats new-api; maintainers ask for a pprof profile (ENABLE_PPROF in .env.example); roll back to a tag you trusted |
Known bugs (open, November 2026)#
- Issue 6972: the active-session limit can block admin login (workaround above; a fix pull request is open).
- Issue 7735: sensitive actions fail when the server clock is off. Fix the clock.
- Issue 7783: console reloads share a rate-limit bucket with login; a pull request is open.
Updates and backups#
Update. Read the release notes, back up, change the tag in docker-compose.yml, then run the docs' order (Windows: use $HOME\docker_volumes\new-api):
cd ~/docker_volumes/new-api
docker compose pull
docker compose down
docker compose up -d
docker compose logs --tail=100 new-api
Then sign in, test a channel and make one call. The docs allow automatic updaters such as Watchtower only for test setups.
Back up. Save as backup.sh, then chmod 700 backup.sh. It dumps PostgreSQL and archives the folders; the archive holds .env, so keep it private and copy it to another machine:
#!/usr/bin/env bash
set -euo pipefail
cd ~/docker_volumes/new-api
stamp=$(date +%F)
docker compose exec -T postgres sh -c 'pg_dump -U root new-api > /tmp/new-api.sql'
docker compose cp postgres:/tmp/new-api.sql "backups/new-api-$stamp.sql"
tar -czf "backups/new-api-files-$stamp.tar.gz" data .env docker-compose.yml
chmod 600 backups/new-api-*
Linux#
Schedule at 03:00 with crontab -e:
0 3 * * * /home/<your-user>/docker_volumes/new-api/backup.sh
Windows (PowerShell)#
Save as backup.ps1 and schedule it in Task Scheduler (daily 03:00, program pwsh, arguments -File "<full path to backup.ps1>"):
Set-Location "$HOME\docker_volumes\new-api"
$stamp = Get-Date -Format yyyy-MM-dd
docker compose exec -T postgres sh -c "pg_dump -U root new-api > /tmp/new-api.sql"
docker compose cp postgres:/tmp/new-api.sql "backups\new-api-$stamp.sql"
Compress-Archive -Path data, .env, docker-compose.yml -DestinationPath "backups\new-api-files-$stamp.zip" -Force
Mac (Terminal)#
Same script and crontab line as Linux, with your home under /Users/<your-user>.
Restore test. Restore into a throwaway database, never over the live one (Windows: same lines in PowerShell):
cd ~/docker_volumes/new-api
docker compose cp backups/new-api-<date>.sql postgres:/tmp/restore.sql
docker compose exec -T postgres createdb -U root restore_test
docker compose exec -T postgres psql -U root -d restore_test -f /tmp/restore.sql -q
docker compose exec -T postgres psql -U root -d restore_test -c '\dt'
docker compose exec -T postgres dropdb -U root restore_test
The \dt listing should show the New API tables.
Performance and resources#
The docs give no memory, CPU or disk figures, so we give none for rc.48. One reporter measured about 75 MiB resident memory on rc.36; it is the only number we found. Measure your own:
- Live use:
docker stats new-api new-api-postgres new-api-redis. - Timeouts:
STREAMING_TIMEOUT(compose comment: default 120 seconds; raise it for empty completions) andRELAY_TIMEOUT(default 0, no limit). - Caches:
BATCH_UPDATE_ENABLED=trueand Redis are on in the official file. - Several instances: the docs describe a cluster mode with a shared database and
SESSION_SECRET; update the primary node first. Not covered here. - In the console: the Dashboard shows usage and success rates; the usage log shows time to first token per call.
FAQ#
Is New API free? Yes, under AGPL-3.0. You still pay the providers behind your channels. The README gives a contact address for other licence terms.
Does it need a GPU? No, it only forwards requests. A GPU matters for Ollama or vLLM behind it.
Can I resell model access? The README says it is for lawful, authorised use and tells public-service operators to meet filing, licensing and upstream obligations. Read it first.
Is the project abandoned or renamed? Neither. It is active and sits under the QuantumNous organisation; the old Calcium-Ion address redirects. The Docker Hub name is still calciumion/new-api.
Sources#
- New API repository, release v1.0.0-rc.48, README, docker-compose.yml, .env.example, LICENSE, setup code and Ollama adaptor - read November 2026
- Docs: Docker Compose, Docker, system update, environment variables, channels, using the API, FAQ - read November 2026
- calciumion/new-api on Docker Hub (tag
v1.0.0-rc.48checked), Caddy release v2.11.8 and Caddy reverse_proxy - November 2026 - GitHub issues #4178, #6972, #7361, #7735, #7783, #8002 - read November 2026
- Our guides: LiteLLM proxy, Ollama, Caddy
Checked against the official docs on 2026-11-05.