This guide will walk you through installing and configuring ComfyUI on Ubuntu with simple, copy-pastable commands. I’ve designed this to be as straightforward as possible, explaining each step along the way.
Introduction
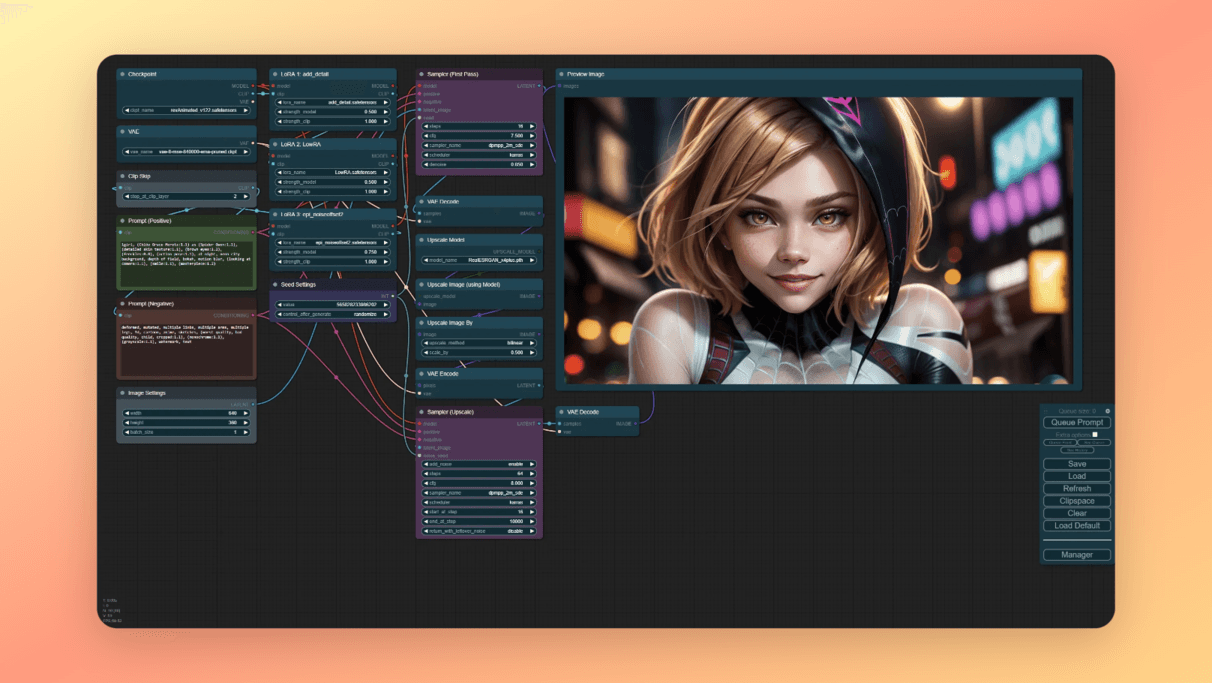
ComfyUI is a powerful tool for creating AI-generated images using Stable Diffusion models. It uses a visual, node-based interface where you connect different components together – kind of like building with blocks. This makes it much easier to use than typing commands.
What you’ll get when you’re done:
- A working ComfyUI installation on your Ubuntu computer
- The ability to generate AI images with various models
- ComfyUI running as a system service (starting automatically when your computer boots)
- Optional: Access to ComfyUI from other devices on your network
Prerequisites
Before we start, you’ll need:
- An Ubuntu computer (version 20.04 or newer)
- Administrator access (ability to use sudo commands)
- At least 8GB of RAM (16GB or more is better)
- A graphics card (GPU) with at least 4GB of memory
- Internet connection
Don’t worry if you’re not sure about some of these requirements – we’ll check them as we go.
1. System Update and Basic Dependencies
First, let’s make sure your system is up to date and has the basic software we need.
Open a terminal window by pressing Ctrl+Alt+T on your keyboard, then copy and paste these commands:
sudo apt update
sudo apt upgrade -y
sudo apt install -y git python3 python3-pip python3-venv
What this does:
- Updates your system’s package list
- Upgrades any outdated packages
- Installs Git (for downloading ComfyUI), Python (the programming language ComfyUI uses), and tools for creating isolated Python environments
2. Graphics Driver Installation
For ComfyUI to work well, you need proper drivers for your graphics card. We’ll cover both NVIDIA and AMD installations. You only need to follow the section that matches your graphics card type.
2.1 Checking Your Graphics Card Type
Not sure what graphics card you have? Run this command:
lspci | grep -E "VGA|3D|Display"
Look at the output – if you see “NVIDIA” in the results, follow the NVIDIA instructions. If you see “AMD” or “Radeon,” follow the AMD instructions.
2.2 For NVIDIA GPUs
2.2.1 Disable the Default Open-Source Driver
The default open-source driver (Nouveau) doesn’t work well for AI tasks. We need to disable it:
echo 'blacklist nouveau' | sudo tee -a /etc/modprobe.d/blacklist-nouveau.conf
echo 'options nouveau modeset=0' | sudo tee -a /etc/modprobe.d/blacklist-nouveau.conf
sudo update-initramfs -u
What this does: Prevents the basic open-source driver from loading, so we can use NVIDIA’s better-performing driver instead.
2.2.2 Install NVIDIA Driver
sudo add-apt-repository ppa:graphics-drivers/ppa
sudo apt update
ubuntu-drivers devices
The last command will show you available drivers. Look for a line that says “recommended” – note that version number.
Now install the recommended driver (replace “550” with your recommended version):
sudo apt install -y nvidia-driver-550
Note: If you already have the NVIDIA driver installed, you’ll see a message saying it’s already the newest version. That’s fine – you can continue to the next step.
2.2.3 Reboot Your System
sudo reboot
After your computer restarts, open a terminal again and continue.
2.2.4 Verify the Driver Installation
nvidia-smi
You should see information about your GPU and the installed driver. If you see an error message instead, the driver installation might have failed – try rebooting again or checking for error messages.
2.3 For AMD GPUs
2.3.1 Install AMD GPU Drivers
For Ubuntu 22.04 or newer:
sudo mkdir --parents --mode=0755 /etc/apt/keyrings
wget https://repo.radeon.com/rocm/rocm.gpg.key -O - | \
    gpg --dearmor | sudo tee /etc/apt/keyrings/rocm.gpg > /dev/null

echo "deb [arch=amd64 signed-by=/etc/apt/keyrings/rocm.gpg] https://repo.radeon.com/amdgpu/6.0.2/ubuntu jammy main" \
    | sudo tee /etc/apt/sources.list.d/amdgpu.list
sudo apt update

sudo apt install -y amdgpu-dkms
sudo usermod -a -G render,video $USER
What this does:
- Adds AMD’s software repository to your system
- Installs the AMD GPU drivers
- Adds your user account to the groups needed to use the GPU
2.3.2 Reboot Your System
sudo reboot
3. ComfyUI Installation
Now let’s install ComfyUI itself.
3.1 Clone the Repository
This downloads the ComfyUI software to your computer:
cd ~
git clone https://github.com/comfyanonymous/ComfyUI.git
cd ComfyUI
3.2 Create and Activate a Virtual Environment
A virtual environment is like a separate container for Python packages. It keeps ComfyUI’s dependencies separate from your system’s Python installation:
python3 -m venv venv
source venv/bin/activate
You’ll notice your terminal prompt now starts with (venv), showing you’re in the virtual environment.
3.3 Install PyTorch
PyTorch is a machine learning framework that ComfyUI needs. We’ll install different versions depending on your graphics card.
For NVIDIA GPUs:
pip install torch torchvision torchaudio --extra-index-url https://download.pytorch.org/whl/cu121
For AMD GPUs:
pip install torch torchvision torchaudio --index-url https://download.pytorch.org/whl/rocm6.0
What this does: Installs PyTorch with the right settings for your graphics card type.
3.4 Install Required Dependencies
Now let’s install the rest of the software packages ComfyUI needs:
pip install -r requirements.txt
This might take a few minutes, as it’s downloading and installing several packages.
3.5 Test ComfyUI
Let’s make sure ComfyUI works before setting it up permanently:
python main.py
You should see some messages in the terminal, eventually showing something like “Running on local URL: http://127.0.0.1:8188”.
Open a web browser and go to: http://127.0.0.1:8188
You should see the ComfyUI interface. If it works, go back to the terminal and press Ctrl+C to stop ComfyUI.
4. Adding Stable Diffusion Models
ComfyUI needs at least one AI model to generate images.
4.1 Create the Models Directory
mkdir -p models/checkpoints
4.2 Download a Model
You’ll need to download a Stable Diffusion model file (with a .ckpt or .safetensors extension) and place it in the models/checkpoints directory.
Where to find models:
- Hugging Face (https://huggingface.co/models?other=stable-diffusion)
- Civitai (https://civitai.com/)
Popular models for beginners:
- Stable Diffusion 1.5
- Realistic Vision
- Dreamshaper
After downloading a model, move it to the checkpoints folder:
# If you downloaded to your Downloads folder:
mv ~/Downloads/your-model-name.safetensors ~/ComfyUI/models/checkpoints/
Replace “your-model-name.safetensors” with your actual downloaded file name.
5. Setting Up ComfyUI as a System Service
Now we’ll set up ComfyUI to run automatically in the background, even after you restart your computer.
5.1 Check if Default Port (8188) is Available
First, let’s make sure the default port (8188) isn’t already being used by another program:
sudo netstat -tuln | grep 8188
If this command doesn’t return anything, the port is available, and you can continue. If it shows something, that means the port is already in use. In that case, we’ll need to use a different port:
# This finds an unused port
port=$(python3 -c 'import socket; s=socket.socket(); s.bind(("", 0)); print(s.getsockname()[1]); s.close()')
echo "Free port: $port"
Make note of the port number it gives you – we’ll use it in the next step.
5.2 Create a Service File
This file tells your system how to run ComfyUI as a background service:
sudo nano /etc/systemd/system/comfyui.service
A text editor will open. Copy and paste the following text, then replace YOUR_USERNAME with your actual username (the name you use to log in to your computer):
[Unit]
Description=ComfyUI Service
After=network.target

[Service]
Type=simple
User=YOUR_USERNAME
Group=YOUR_USERNAME
WorkingDirectory=/home/YOUR_USERNAME/ComfyUI
Environment=PATH=/home/YOUR_USERNAME/ComfyUI/venv/bin:$PATH
ExecStart=/home/YOUR_USERNAME/ComfyUI/venv/bin/python main.py --listen 0.0.0.0 --port 8188
Restart=on-failure
RestartSec=5s

[Install]
WantedBy=multi-user.target
Important notes:
- If you need to use a different port (from step 5.1), change
--port 8188to use your port number - The
--listen 0.0.0.0part allows ComfyUI to be accessed from other devices on your network, not just from your computer
Save the file by pressing Ctrl+X, then Y, then Enter.
5.3 Enable and Start the Service
Now let’s register and start the service:
sudo systemctl daemon-reload
sudo systemctl enable comfyui
sudo systemctl start comfyui
What this does:
- Reloads the service configuration
- Sets ComfyUI to start automatically when your computer boots
- Starts ComfyUI right now
5.4 Check Service Status
Let’s make sure the service is running properly:
sudo systemctl status comfyui
You should see “active (running)” in green text. Press Q to exit this view.
5.5 Access ComfyUI
Now you can access ComfyUI by opening a web browser and going to:
http://localhost:8188
(If you used a different port, replace 8188 with your port number)
To access from other devices on your network:
- Find your computer’s IP address:
hostname -I | awk '{print $1}'
- On another device on the same network, open a browser and go to: http://YOUR_IP_ADDRESS:8188 (Replace YOUR_IP_ADDRESS with the address from step 1)
6. Optional: Integrating with Nginx Proxy Manager
Note: This section is completely optional. It’s useful if you want to:
- Access ComfyUI using a custom domain name instead of an IP address and port
- Add password protection
- Set up HTTPS for secure access
6.1 Install Docker and Docker Compose (if not already installed)
First, check if Docker is already installed:
docker --version
If you see version information, Docker is already installed and you can skip to step 6.2.
If not, install Docker:
sudo apt install -y docker.io docker-compose
sudo usermod -aG docker $USER
sudo systemctl enable docker
sudo systemctl start docker
Important: After adding yourself to the docker group, you need to log out and log back in for the change to take effect. You can do this by restarting your computer or logging out and back in.
6.2 Create a Directory for Nginx Proxy Manager
mkdir -p ~/docker/nginx-proxy-manager
cd ~/docker/nginx-proxy-manager
6.3 Create Docker Compose File
nano docker-compose.yml
Copy and paste the following content:
version: '3'
services:
  app:
    image: 'jc21/nginx-proxy-manager:latest'
    restart: unless-stopped
    ports:
      - '80:80'
      - '81:81'
      - '443:443'
    volumes:
      - ./data:/data
      - ./letsencrypt:/etc/letsencrypt
Save the file (Ctrl+X, then Y, then Enter).
6.4 Start Nginx Proxy Manager
docker-compose up -d
What this does: Downloads and starts Nginx Proxy Manager in a Docker container.
6.5 Access the Nginx Proxy Manager Dashboard
Open your browser and go to http://YOUR_IP_ADDRESS:81
Replace YOUR_IP_ADDRESS with your computer’s IP address (from the hostname -I command earlier).
Default login credentials:
- Email: admin@example.com
- Password: changeme
You’ll be prompted to change these after your first login.
6.6 Create a Proxy Host for ComfyUI
- In the dashboard, go to “Proxy Hosts” and click “Add Proxy Host”
- Fill in the form:
- Domain Name: Enter a name you want to use (e.g., comfyui.local)
- Scheme: http
- Forward Hostname/IP: Your computer’s IP address
- Forward Port: 8188 (or your custom port)
- Check “Block Common Exploits” for better security
- You can also enable SSL if you want HTTPS access
- Save the configuration
7. Optional: Pi-hole Configuration
Note: This section is only relevant if you’re already using Pi-hole for DNS on your network. If you don’t know what Pi-hole is, you can skip this section.
7.1 Add a Local DNS Record for ComfyUI
- Access your Pi-hole admin interface (typically http://pi.hole/admin)
- Go to “Local DNS” → “DNS Records”
- Add a new record:
- Domain: comfyui.local (or your preferred name)
- IP Address: Your computer’s IP address
- Save the record
This lets you access ComfyUI using the domain name you specified (e.g., http://comfyui.local:8188) from any device on your network.
7.2 Configure Pi-hole with Nginx Proxy Manager (If Using Both)
If you’re using both Pi-hole and Nginx Proxy Manager, they might conflict because both want to use port 80. Here are some options:
- Change Pi-hole’s web port:
- Edit the lighttpd configuration:
sudo nano /etc/lighttpd/lighttpd.conf - Find the line with
server.port = 80and change it to another port (e.g.,server.port = 8080) - Restart lighttpd:
sudo systemctl restart lighttpd
- Edit the lighttpd configuration:
- Use Nginx Proxy Manager to proxy Pi-hole as well:
- In Nginx Proxy Manager, add another proxy host for Pi-hole
- Set it to forward to Pi-hole’s IP address on port 80
- Access Pi-hole through this proxy host instead of directly
8. Known Issues and Troubleshooting
8.1 CUDA/GPU Memory Issues
If ComfyUI crashes with “CUDA out of memory” errors or your images fail to generate:
sudo systemctl edit comfyui.service
Add the following lines between the “““ markers:
[Service]
ExecStart=/home/YOUR_USERNAME/ComfyUI/venv/bin/python main.py --listen 0.0.0.0 --port 8188 --lowvram
Replace YOUR_USERNAME with your actual username.
Save (Ctrl+X, Y, Enter) and then restart the service:
sudo systemctl restart comfyui
What this does: Enables low VRAM mode, which uses less GPU memory but might be slightly slower.
For extremely limited VRAM, you can use --medvram or both flags together: --lowvram --medvram
8.2 AMD GPU Driver Issues
Some AMD GPUs (especially newer models) might not work properly with the standard settings. If you see errors when running ComfyUI, you might need to override the graphics version:
sudo systemctl edit comfyui.service
Add the following between the “““ markers:
[Service]
Environment="HSA_OVERRIDE_GFX_VERSION=10.3.0"
For RDNA3 cards like the 7600, use this instead:
[Service]
Environment="HSA_OVERRIDE_GFX_VERSION=11.0.0"
Save and restart:
sudo systemctl restart comfyui
8.3 Service Not Starting
If ComfyUI doesn’t start, check the logs for errors:
sudo journalctl -u comfyui -e
Common issues include:
- Incorrect paths in the service file
- Virtual environment not set up correctly
- Missing dependencies
- GPU driver issues
8.4 Port Already in Use
If you need to change the port after setting up the service:
sudo systemctl edit comfyui.service
Add:
[Service]
ExecStart=/home/YOUR_USERNAME/ComfyUI/venv/bin/python main.py --listen 0.0.0.0 --port 8189
Replace 8189 with your desired port number. Save and restart:
sudo systemctl restart comfyui
9. Maintenance and Updates
9.1 Updating ComfyUI
To update ComfyUI to the latest version:
cd ~/ComfyUI
sudo systemctl stop comfyui
git pull
source venv/bin/activate
pip install -r requirements.txt
sudo systemctl start comfyui
What this does:
- Stops the ComfyUI service
- Downloads the latest code
- Updates any dependencies
- Restarts the service
9.2 Updating GPU Drivers
For both NVIDIA and AMD, the simplest way to update drivers is:
sudo apt update
sudo apt upgrade -y
This will update your drivers along with other system packages.
Conclusion
You now have a fully functioning ComfyUI installation on your Ubuntu system! You can access it directly through your web browser at http://localhost:8188 (or your custom domain if configured).
If you make any changes to the configuration, remember to restart the service using:
sudo systemctl restart comfyui
Enjoy creating amazing AI-generated images with ComfyUI!
Leave a Reply